 Skip to content


DIY - Reusable Food Wraps

Bees wax wraps - by Jo
So I decide to try making my own beeswax wraps. At first I thought, what have I got myself into. I had wax everywhere and was beginning to regret starting this project. Me being me pressed on as I don’t like things to bet me. I’m so glad I did as my final project resulted in 5 perfect wraps and I couldn’t of been more happier. I was actually looking for more material because I didn’t want to stop.
They say you learn by your mistakes and that I did.
I have put together my step by step guide so hopefully you to will love making these beautiful environmentally friendly wraps as much as I do.
I got my beeswax wrap kit from Centaur Packaging, they have a few different designs to choose from. The kit contains 5 pre-cut wraps, baking paper and 150gms of beeswax pellets. More than enough wax for your wraps so if you had some spare material laying around or are into making lip balms etc there is heaps.
If you are new to this I would start with the smallest wrap first. I’m glad I did this as this one was my disaster. I used way to much beeswax. I ended up fixing this by putting it back into the oven for about 2 minutes then quickly wiping the excess wax of with a paper towel. I did this a couple of times.
Also another thing I suggest is to iron your wraps flat first before putting it in the oven. The wax tends to run away from any high spots. The flatter the better.
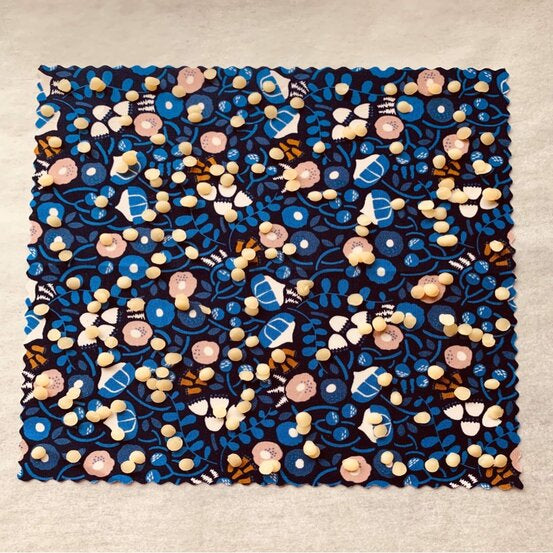
Too much was on the above image.
My second attempt on the small wrap I reduced the amount of wax I used. Approximately 1 tbs, make sure you put it right around the edges. The more time you spend evenly applying the wax the easier the job when it comes out of the oven. This is about all wax you need.

At first I was using a small paint brush to to help disperse the hot wax when it came out of the oven. I ended up using a brush the same size as a pastry brush. Much easier and quicker.
If you find you have a large area with no wax, just place a few more pellets in that section and reheat in the oven.

I also worked out, that if you remove your wrap from the oven and quickly brush the whole thing over and then carefully lift the wrap from one corner in one hand and grab the other corner and hold for a couple of seconds it stops it the back of the wrap going funny. If you have uneven spots on the back simply flip the wrap over and reheat, brush and remove from baking tray.
The middle size wrap that’s included in your kit, I found about 1 1/2 tbs was enough wax. As for the big one I used 2 1/2 tbs. To be honest I was nervous doing this one as this is quiet a big wrap. I could not believe when I lifted it from the tray it was perfect, my best one yet.

So as you can see it wasn’t as bad as first thought and I ended up with 5 perfect wraps.
If you have ever wanted to give these a go I highly recommend it. Just take your time, less is more and make sure you have shoes on because hot wax between your toes is really not that pleasant :)
Jo.
Blog posts
Sharing Essential Oils: Cost-Effective and Purposeful
Simple Lip Luxe Recipe

